
LED Configuration
The NexGenEFI Pro Edition digital dash has 16 LED lights which run across the top of the display. The 5 CENTER LEDs are configurable to turn on based on user settings. The other 11 are used as a SHIFT LIGHT, yellow color by default UNLESS you enable TEXT ONLY and select a LED Fx to use in its place.
To access the LED Configuration screen, you will need to go to the main Configuration Screen and press the LED button.


External LEDs checkbox – if you have purchased a Pro Edition and it has external LEDs, if you orient the LEDs vertically it might place the 5 center LEDs “backwards”. This option flips the 5 center LEDs.
TEXT ONLY checkbox – If selected it will DISABLE the 5 center LEDs and display a TEXT Notification if any LED configuration threshold is met. It will also enable you to use ALL 16 LEDs in the LED Fx for RPM.
Example LED configuration
In our example below, we are going to configure LED #6. We want the CLT (Coolant) to be monitored and if the temperature is GREATER THAN OR EQUAL 205, turn the LED to ORANGE. The CLT is pulled from CANBus. LED #7 is configured to monitor OIL pressure if it is LESS THAN OR EQUAL to 25, turn LED #7 ORANGE.
So the datapoints you are monitoring will be in the combo box.

Once you are done configuring, hit SAVE otherwise your LED configuration will not be retained.
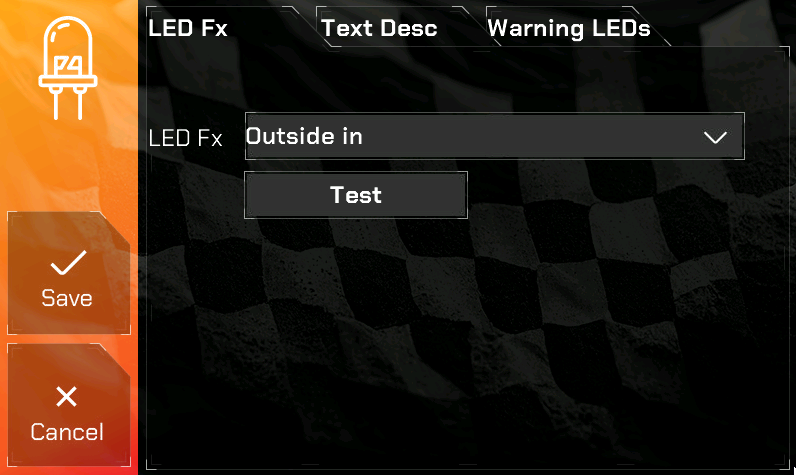
LED Fx Configuration
In order to use all 16 LEDs you will need to ensure TEXT ONLY is checked and you select a LED Fx type from the LED Fx tab as seen below. You can press Test to view what it does. More LED Fx options will be added in a future update.